These are the steps to install XGBoost on Ubuntu GPU system.
First, check the CUDA version in your system using the following command.
nvcc --version

If it shows version 7.5, then you have to upgrade your Cuda version using the following steps.
Get updated Nvidia driver from the link below:
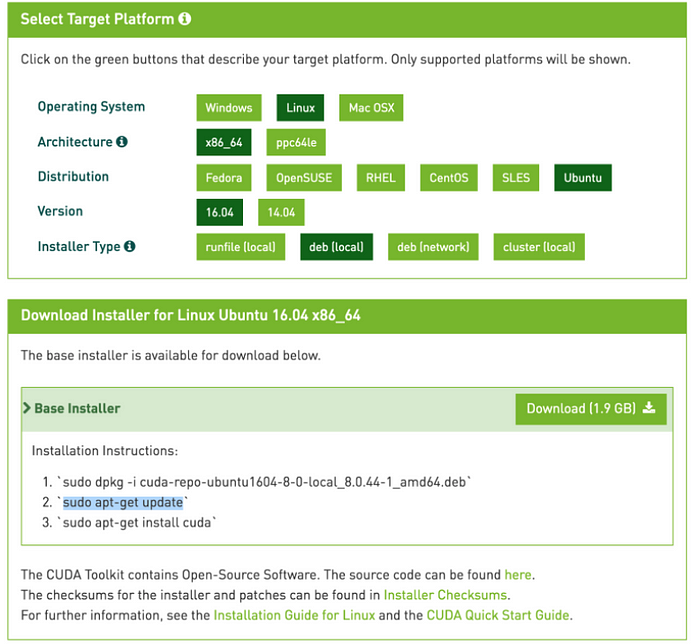
Select proper OS version, architecture, distribution, version and installer then download the full driver locally:

Once you have downloaded package, hit this following commands in terminal :
sudo dpkg -i cuda-repo-ubuntu1604–9–2-local_9.2.148–1_amd64.debsudo apt-get updatesudo apt-get install cuda
Now you have installed/upgrade your Cuda version. But, there are some post-installation actions which you have to manually perform. For that run the following commands.
export PATH=/usr/local/cuda-9.2/bin${PATH:+:${PATH}}export LD_LIBRARY_PATH=/usr/local/cuda-9.2/lib64\ ${LD_LIBRARY_PATH:+:${LD_LIBRARY_PATH}}
Now, We have successfully installed/upgrade Cuda version. Let’s check the Cuda version again.
nvcc --version

Now, it’s time to install XGBoost. Run the following commands.
git clone — recursive https://github.com/dmlc/xgboostcd xgboostmkdir buildcd buildcmake .. -DUSE_CUDA=ONmake -j
Now we have successfully install XGBoost with GPU support on Ubuntu.
Now, Initialize XGBoostClassifier with GPU support.
clf = xgb.XGBClassifier(colsample_bytree=0.4603,
                        learning_rate=0.02,
                        max_depth=4,
                        tree_method = ‘gpu_hist’)
It’s much faster than the CPU. If you find this article useful please like it.
Thanks…
Your work is amaing Bhavika,
It is very helpful people like newbies (especially me 🙂 )
Please keep posting such materials
Thanks
Thanks, Divyesh