Keras’ ImageDataGenerator class allows the users to perform image augmentation while training the model. If you do not have sufficient knowledge about data augmentation, please refer to this tutorial which has explained the various transformation methods with examples. You can also refer this Keras’ ImageDataGenerator tutorial which has explained how this ImageDataGenerator class work.
Keras’ ImageDataGenerator class provide three different functions to loads the image dataset in memory and generates batches of augmented data. These three functions are:
- .flow()
- .flow_from_directory()
- .flow_from_dataframe.()
Each of these function is achieving the same task to loads the image dataset in memory and generates batches of augmented data, but the way to accomplish the task is different.
This tutorial has explained flow() function with example.
Prepare Dataset
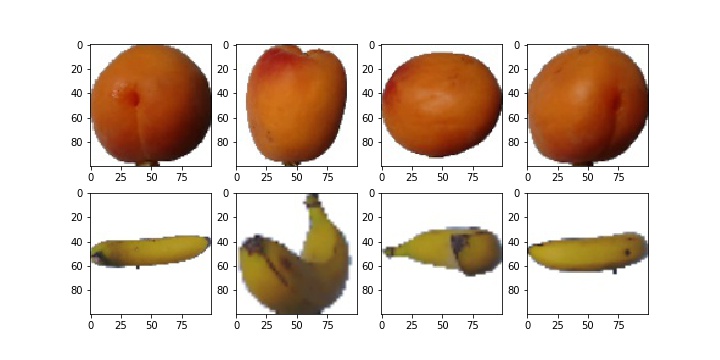
For demonstration, we use the fruit dataset which has two types of fruit such as banana and Apricot. Each class contain 50 images. You can download the dataset here and save & unzip it in your current working directory. we need to train a classifier which can classify the input fruit image into class Banana or Apricot.
Let’s plot the images of train data.
In [1]:
%matplotlib inline
import matplotlib.pyplot as plt
import os
src_path = "data/train/"
sub_class = os.listdir(src_path)

fig = plt.figure(figsize=(10,5))
path = os.path.join(src_path,sub_class[0])
for i in range(4):
    plt.subplot(240 + 1 + i)
    img = plt.imread(os.path.join(path,str(i)+'.jpg'))
    plt.imshow(img, cmap=plt.get_cmap('gray'))

path = os.path.join(src_path,sub_class[1])
for i in range(4,8):
    plt.subplot(240 + 1 + i)
    img = plt.imread(os.path.join(path,str(i)+'.jpg'))
    plt.imshow(img, cmap=plt.get_cmap('gray'))

Out[1]:
Implementing a training Script
Let’s import the required packages.
In [2]:
from keras.models import Sequential
from keras.layers import Conv2D, MaxPooling2D, Dense, Flatten, Dropout
from keras.preprocessing.image import ImageDataGenerator
from keras.utils import to_categorical
from sklearn.preprocessing import LabelEncoder
from sklearn.model_selection import train_test_split
import numpy as np
import cv2
import os
Let’s load the train images and test images.
In [3]:
src_path = "data/train"
train_data = []
train_label = []
for e in os.listdir(src_path):
    path = os.path.join(src_path,e)
    for x in os.listdir(path):
        img = cv2.imread(os.path.join(path,x))
        train_data.append(img)
        train_label.append(e)
In [4]:
src_path = "data/test"
test_data = []
for e in os.listdir(src_path):
    img = cv2.imread(os.path.join(src_path,e))
    test_data.append(img)
Let’s normalized each pixel values to the range [0,1] and encode the target label.
In [5]:
train_data = np.array(train_data, dtype="float") / 255.0
test_data = np.array(test_data, dtype="float") / 255.0

le = LabelEncoder()
train_label = le.fit_transform(train_label)
train_label = to_categorical(train_label)
(trainX, valX, trainY, valY) = train_test_split(train_data, train_label, test_size=0.20, random_state=42)
Let’s initialize the Keras’ ImageDataGenerator class
In [6]:
train_datagen = ImageDataGenerator(
        rotation_range=20,
        zoom_range=0.15,
        width_shift_range=0.2,
        height_shift_range=0.2,
        shear_range=0.15,
        horizontal_flip=True,
        fill_mode="nearest")

test_datagen = ImageDataGenerator()
Let’s create our train generator, validation generator and test generator
In [7]:
batch_size = 8
train_generator = train_datagen.flow(trainX, trainY, batch_size=batch_size)
valid_generator = train_datagen.flow(trainX, trainY, batch_size=batch_size)
test_generator = test_datagen.flow(test_data, batch_size=1)
Let’s prepare a convolutional neural network (CNN).
In [8]:
def prepare_model():
    model = Sequential()
    model.add(Conv2D(32,kernel_size=(3,3),activation='relu',input_shape=(100, 100, 3)))
    model.add(MaxPooling2D(pool_size=(2, 2)))
    model.add(Flatten())
    model.add(Dense(16, activation='relu'))
    model.add(Dense(1, activation='sigmoid'))
    model.compile(loss="binary_crossentropy",optimizer="adam",metrics=['accuracy'])
    return model
Let’s train the model:
In [9]:
model = prepare_model()
model.fit_generator(train_aug, validation_data=(testX, testY),
 steps_per_epoch=len(trainX) // batch_size,
 epochs=5)
Out[9]:
Epoch 1/5
10/10 [==============================] - 2s 182ms/step - loss: 0.7499 - acc: 0.5875 - val_loss: 0.3824 - val_acc: 0.7125
Epoch 2/5
10/10 [==============================] - 1s 130ms/step - loss: 0.3015 - acc: 0.7500 - val_loss: 0.2117 - val_acc: 0.7625
Epoch 3/5
10/10 [==============================] - 1s 127ms/step - loss: 0.2017 - acc: 0.8250 - val_loss: 0.1759 - val_acc: 0.9812
Epoch 4/5
10/10 [==============================] - 1s 125ms/step - loss: 0.1159 - acc: 1.0000 - val_loss: 0.0284 - val_acc: 1.0000
Epoch 5/5
10/10 [==============================] - 1s 132ms/step - loss: 0.0109 - acc: 1.0000 - val_loss: 0.0062 - val_acc: 1.0000
Let’s evaluate our Model
In [10]:
score = model.evaluate_generator(valid_generator)
print('Test loss:', score[0])
print('Test accuracy:', score[1])

Out[10]:
Test loss: 0.00240
Test accuracy: 1.0
Let’s make a prediction on test data using Keras’ predict_generator:
In [11]:
predict = model.predict_generator(test_generator)
# predict the class label
y_classes = predict.argmax(axis=-1)
. . .