Introduction
AWS Lambda has allowed you to share common dependencies to ease lambda deployment
size and updates. However, still it hasn’t addressed the need for friendly steps to bring in
non-native python packages such as Pandas.
In this article, we will go through, how to create layers with libraries or custom codes and share
between all your lambdas functions, and it is very easy to do this, Let’s do it…
Prerequisites:
– To work with AWS Lambda, you require an AWS management console credentials.
Basic Understanding:
In AWS lambda functions, we can load or import any python packages like Numpy, pandas, matplotlib, spacy, BeautifulSoup, etc as Layer configuration.
First of all, Once you need to use a python library you have two options:
Option 1) Deploy your code alongside with necessary libraries. (will result in large files to
upload), which is not recommended in most of the cases
Option 2) Create layers and add them in your lambda function, which is more feasible to use.
Thus Here we have been going throw second option, super convenient for developers!
Building zip file:
Let’s Say, we want to use “Requests” python library in lambda function, so first we will build in
local system and then upload zip file as a custom layer.
In Ubuntu system,
Go to Terminal and type following command step by step:
1. Create new folder
cd <folder-name>
2. Create python folder
Here I have used python3.9 as lambda runtime, it can be changed.
3. Once done, install library using this command
4. Create Zip File
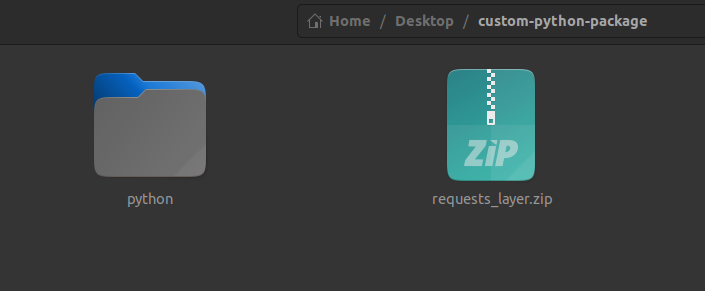
Upload / Add zip to AWS lambda
Now we are ready to add this zip file into aws lambda function.
If your zipped file is larger than 50 MB then you will need to upload it to S3 as opposed to
uploading the zip directly in Lambda Layers but here we have zip is less than 50 MB so we can
directly upload
-
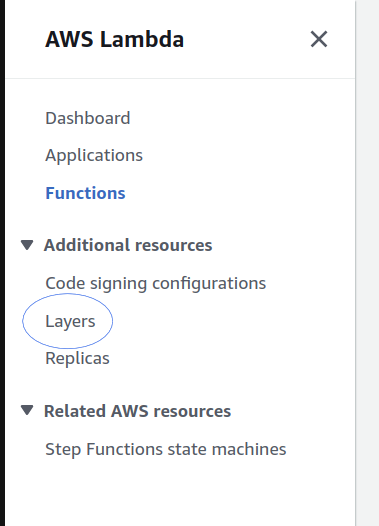
- First, Go to AWS console, type “AWS lambda”
- In Lambda console, Click on “Layers”, shown in round circle below
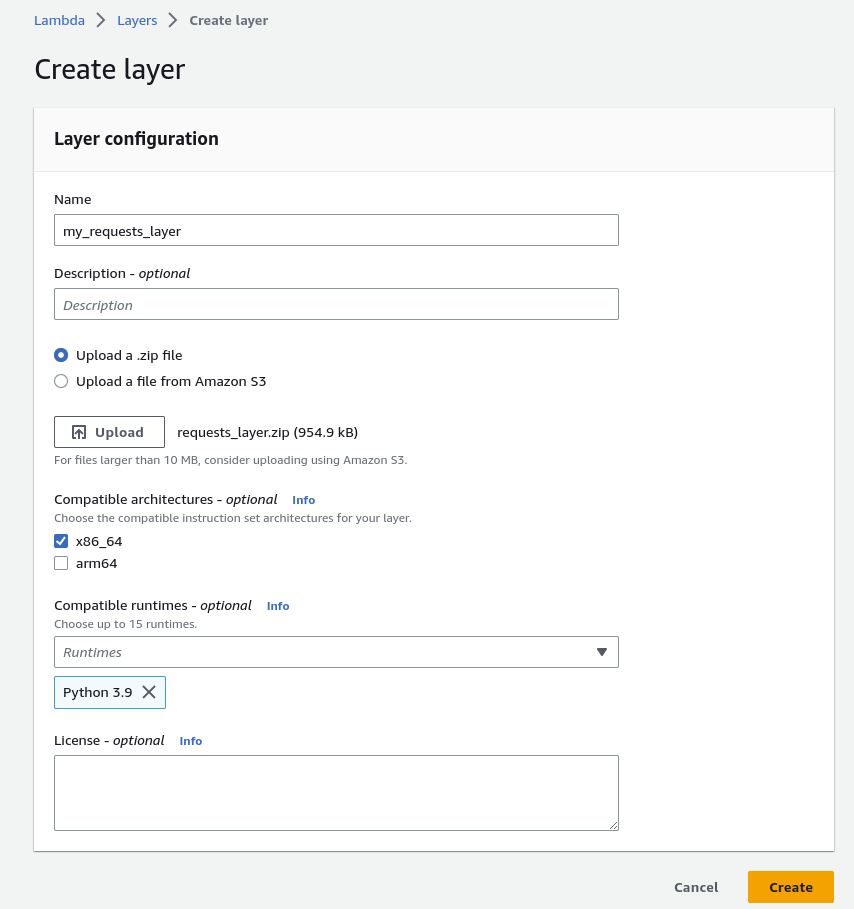
- Then click on “Create Layer”,
- After that fill details as shown in below image, and press “Create”:
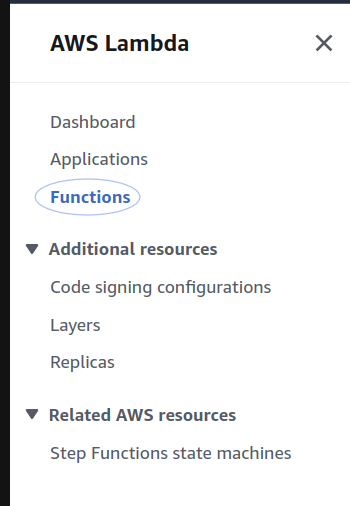
- Now from side panel in lambda console click “Functions”, as shown below,
- Then click on “create function”, and fill details as shown in below image, press
“create function”.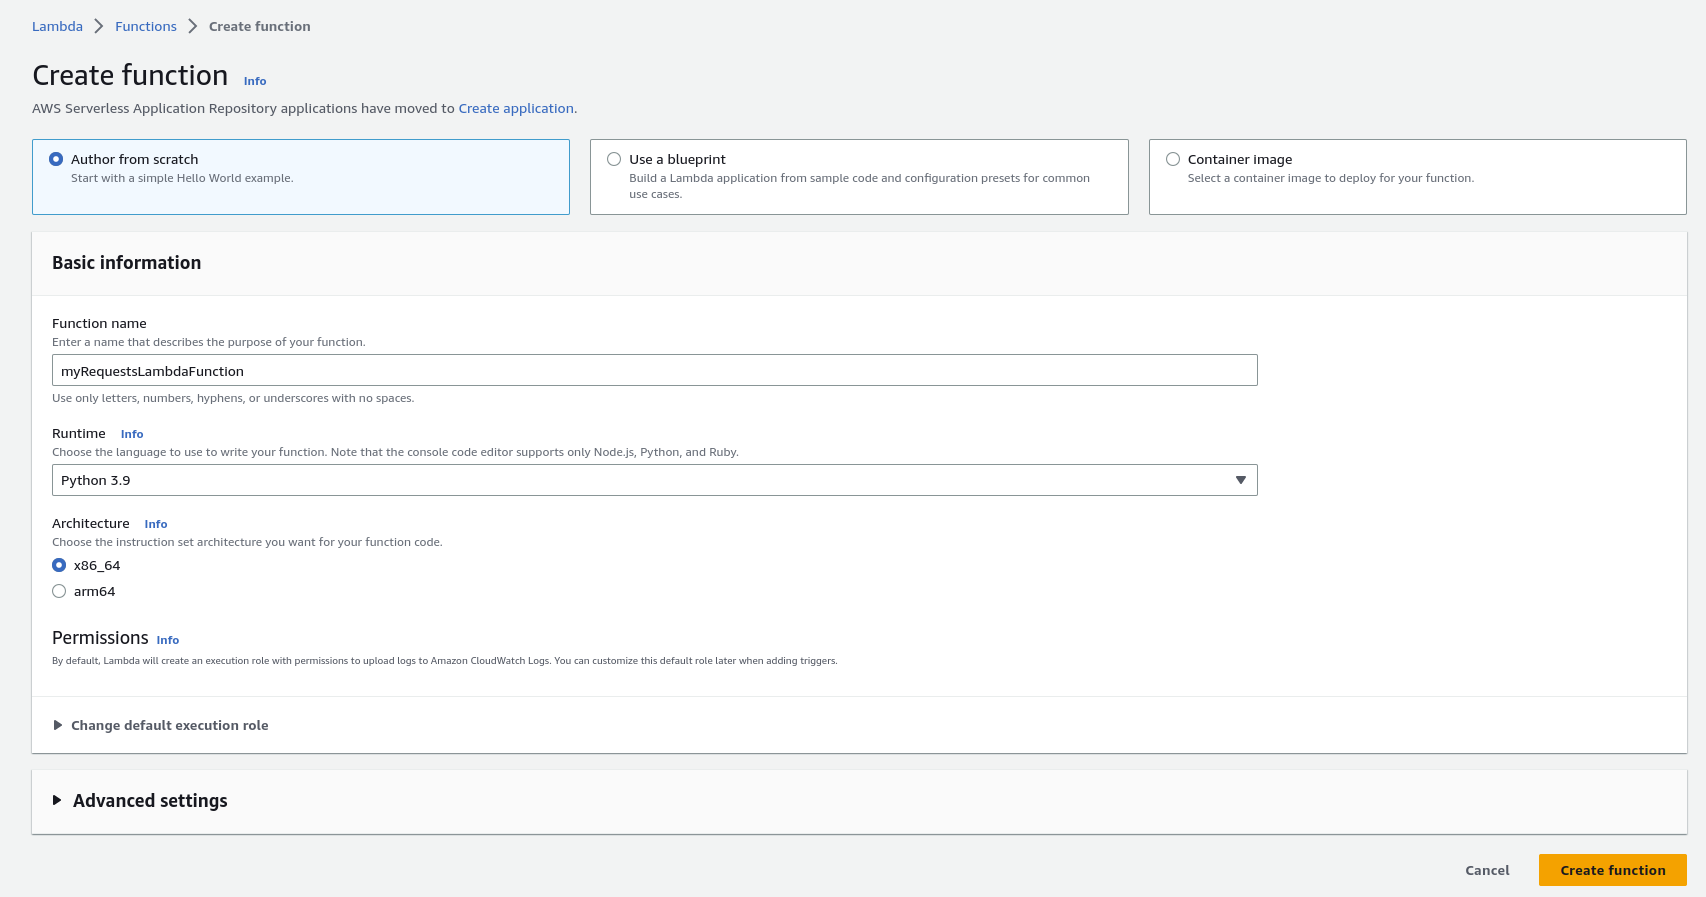
- After creating function, go into this function here named “myRequestsLambdaFunction”
At bottom of function, there is Layers section as shown below and click on “Add a
Layer”
- . Then fill details as shown below:
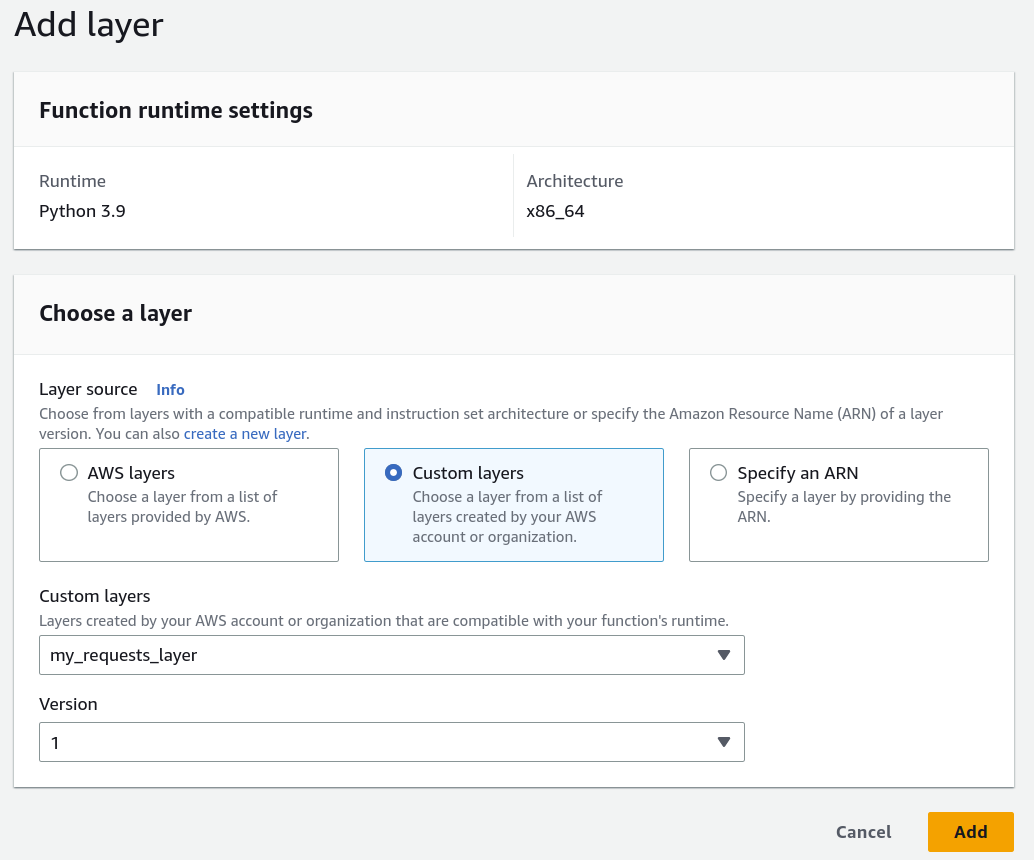 Choose “Custom Layers” as Layer source, then from custom layers dropdown select
previously created layer, here named “my_requests_layer” and version as default.
Then click on “Add” - Now Final step is to create our Lambda function.
In lambda function console, there is code section as shown below: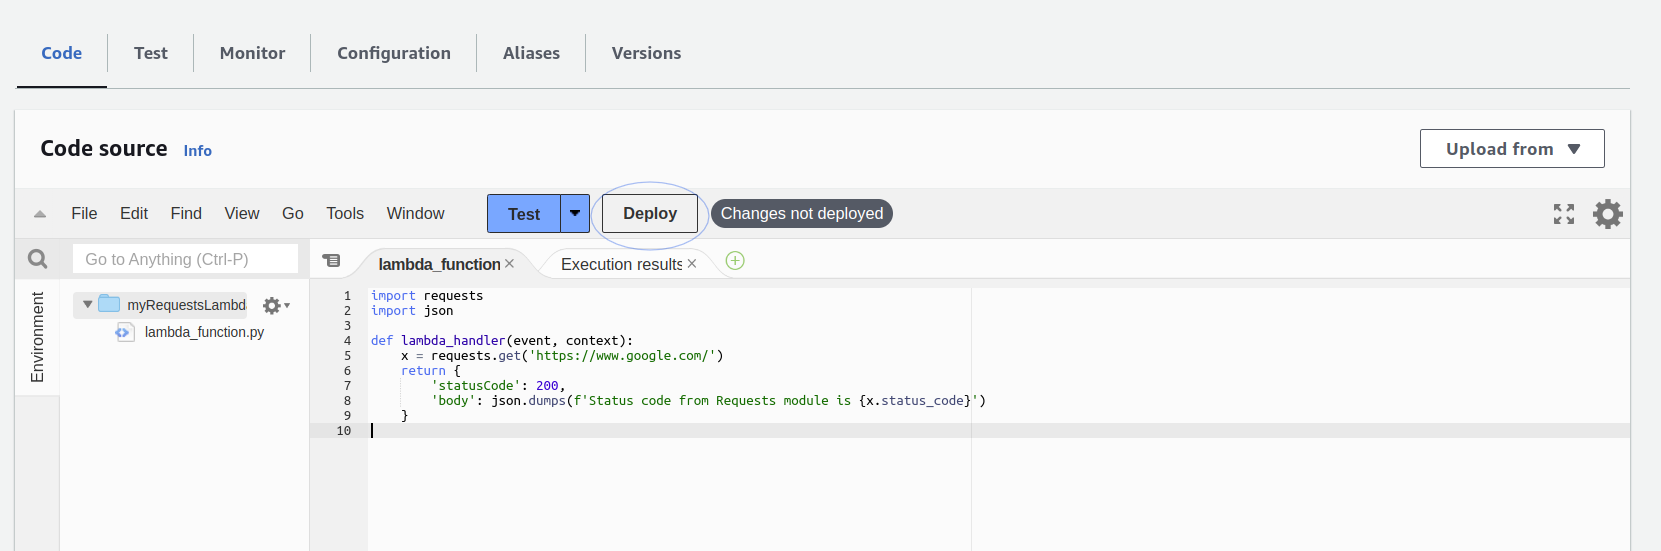 Write your python code and click on “Deploy”.
 - Finally, click on “Test”, you will get response as shown below:
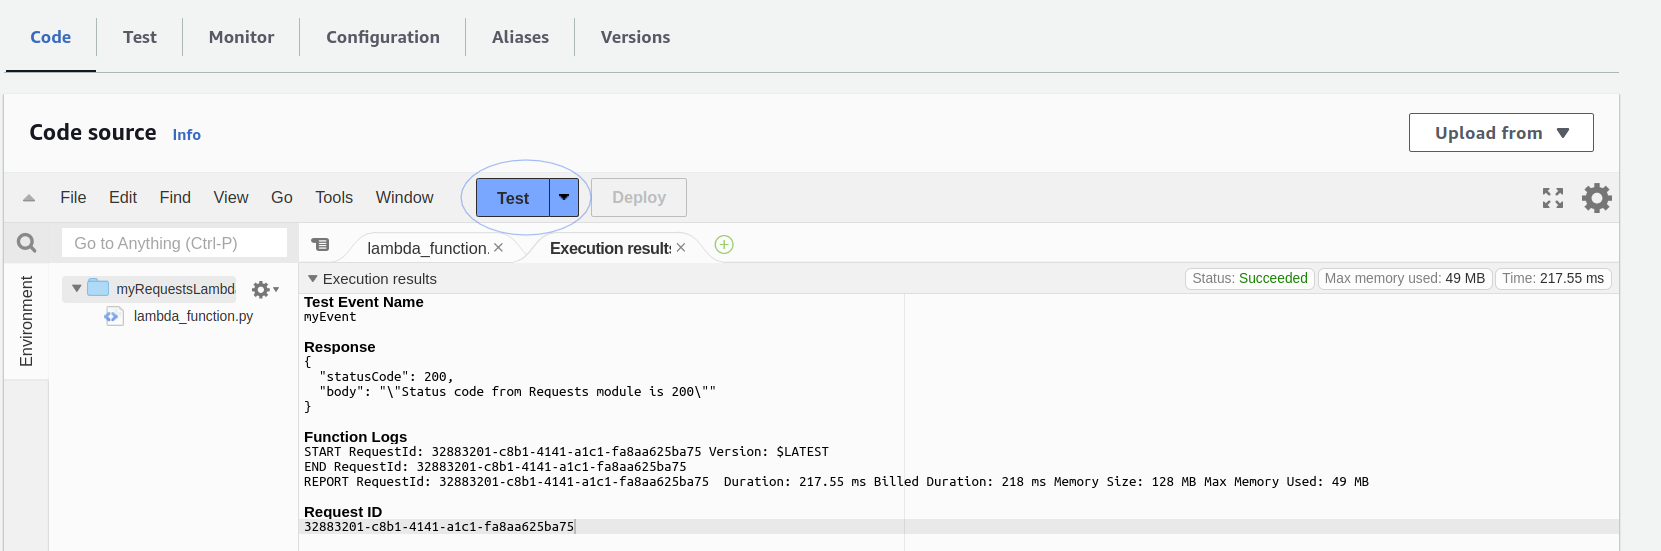 Amazing!! We have done it successfully.
But there are some limitations, lets see,
Limitations of Lambda Layers:
There are a few limitations that you need to be aware of and this includes:
- You can only use up to 5 layers per Lambda.
- The total unzipped size of the function and all layers cannot exceed the
unzipped deployment package size quota of 250 MB.