What is YOLOV4?
YOLOV4 is an object detection algorithm and it stands for You Look Only Once. It is a real-time object detection system that recognizes different objects in a single frame. It is twice as fast as EfficientNet with comparable performance. In addition, AP (Average Precision) and FPS (Frames Per Second) in YOLOv4 have increased by 10% and 12% respectively compared to YOLOv3.
What is YOLOV4-Tiny?
YOLOV4-tiny is a compressed version of YOLOV4. Its main objective is to make the network structure simpler and reduce parameters so that it becomes reliable to use in mobile and IoT devices.
In this tutorial, we will discuss how to train YOLOV4-tiny and darknet for a custom objectsdetection.
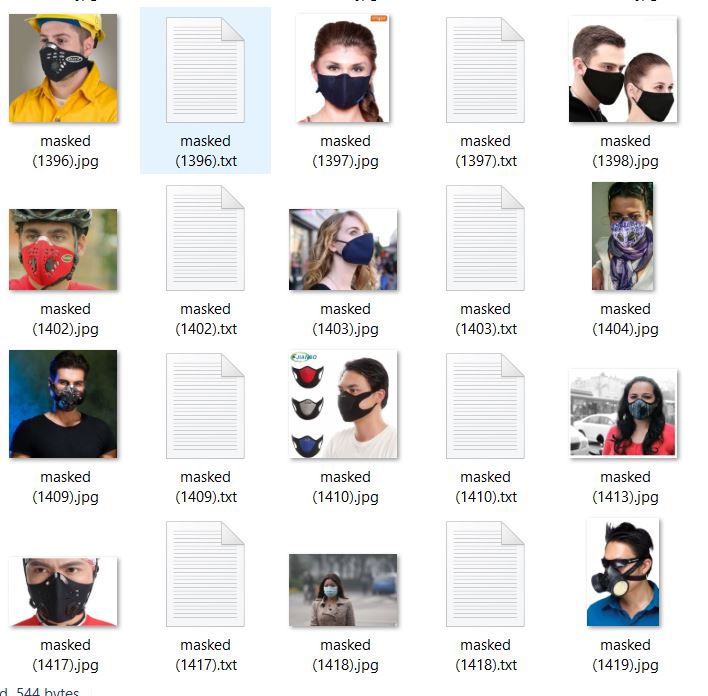
Prepare dataset for training YOLOV4-tiny for mask detection.
– Prepare the dataset in the specific format, that is supported by YOLOV4-tiny.

– The images and annotations file’s names must be the same and, in the annotation file, you need to specify the bounding box coordinates and object class.
– <object-class> – integer number of object from 0 to (classes-1)
– <x> <y> <width> <height> – float values relative to width and height of image, it can be equal from (0.0 to 1.0]
– For example: <x>=<absolute_x>/<image_width>or<height>=<absolute_height>/<image_height>
– Attention: <x> <y> – are center of rectangle (are not top-left corner).
– For example:
– 1 0.716797 0.395833 0.216406 0.147222
– 0 0.687109 0.379167 0.255469 0.158333
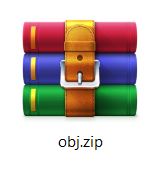
– Then, you need to combine all class images into one folder and compress it into .zip.
Create the following files which we need for training a custom detector
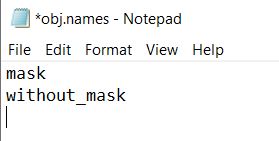
– Create obj.names file, to define the name of all the classes, in our case we need to define mask and without_mask classes in obj.names file.
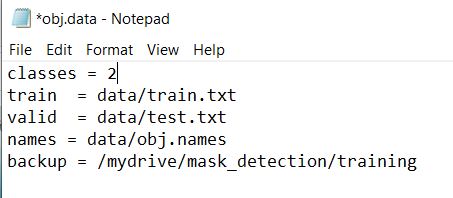
– Create obj.data file and specify classes and train and test txt files path and also, where your model is been saved after training.
– Then, create the process.py file to make train and test txt file and add images path into that file.
import glob, os
# Current directory
current_dir = os.path.dirname(os.path.abspath(__file__))
print(current_dir)
current_dir = 'data/obj'

# Percentage of images to be used for the test set
percentage_test = 10;
# Create and/or truncate train.txt and test.txt
file_train = open('data/train.txt', 'w')
file_test = open('data/test.txt', 'w')

# Populate train.txt and test.txt
counter = 1
index_test = round(100 / percentage_test)
for pathAndFilename in glob.iglob(os.path.join(current_dir, "*.jpg")):
title, ext = os.path.splitext(os.path.basename(pathAndFilename))

if counter == index_test:
counter = 1
file_test.write("data/obj" + "/" + title + '.jpg' + "\n")
else:
file_train.write("data/obj" + "/" + title + '.jpg' + "\n")
counter = counter + 1
– As we are trained YOLOV4 for 2 classes below mentioned changes are required.
– Download the YOLOV4-tiny.cfg from here.
– change few parameters according to our mask detector model.
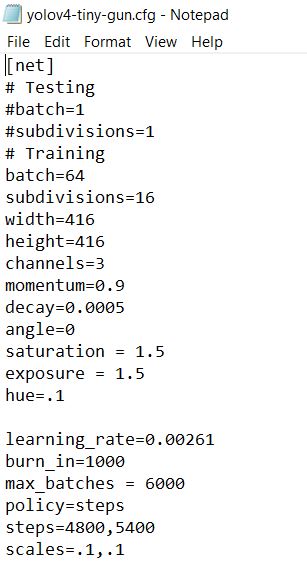
– change line batch to batch=64.
– change line subdivisions to subdivisions=16.
– set network size width=416 height=416 or any value multiple of 32.
– change line max_batches to (classes*2000 but not less than the number of training images and not less than 6000), f.e. max_batches=6000 if you train for 3 classes.
– change line steps to 80% and 90% of max_batches, f.e. steps=4800,5400.
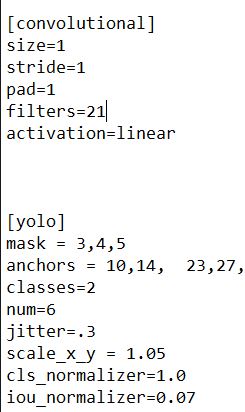
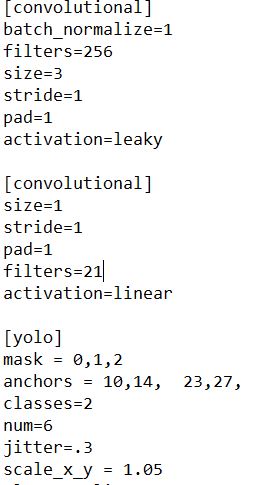
– change [filters=255] to filters=(classes + 5)x3 in the 2 [convolutional] before each [yolo] layer, keep in mind that it only has to be the last [convolutional] before each of the [yolo] layers.
– change line classes=80 to your number of objects in each of 2 [yolo]-layers.
– So, if classes=1 then it should be filters=18. if classes=2 then write filters=21.
Now, let’s go with the training part.
create one folder in google drive and upload all files in that folder and create one more folder named training inside this folder.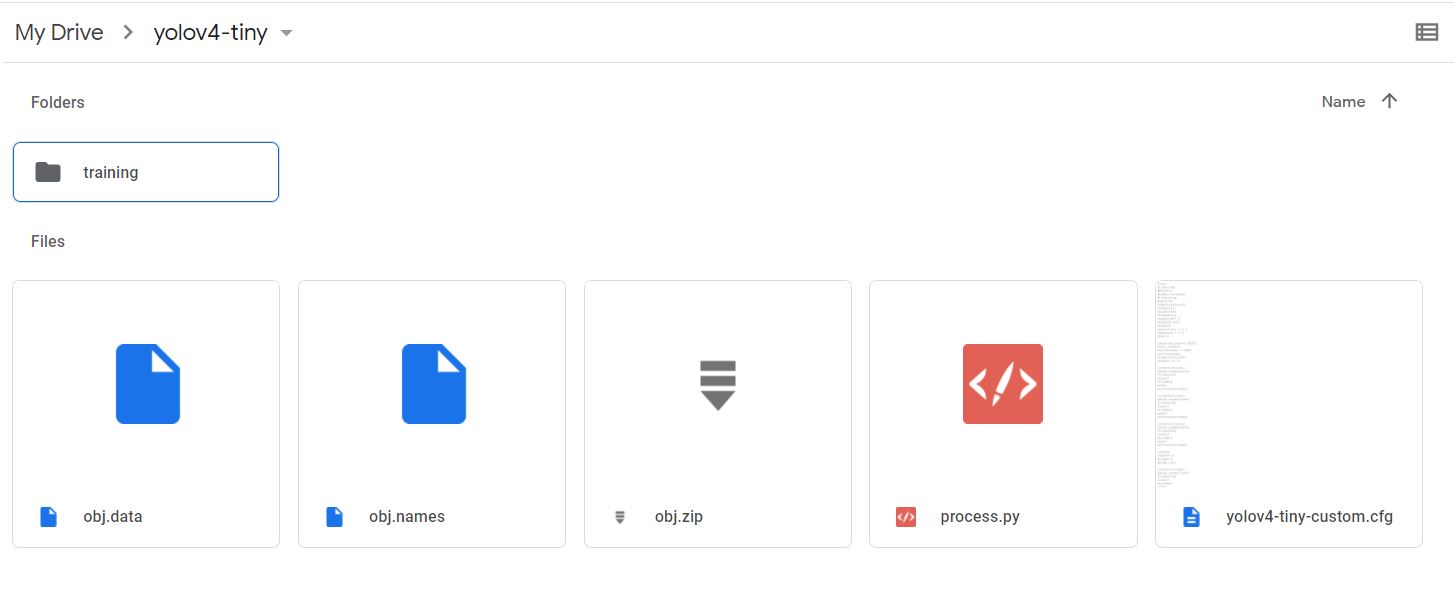
Then, go to google colab and run the following code.
!git clone https://github.com/AlexeyAB/darknet
Mount google drive and link your folder.
%cd ..
from google.colab import drive
drive.mount('/content/gdrive')
!ln -s /content/gdrive/My\ Drive/ /mydrive
Make changes into makefile to enable OPENCV and GPU.
%cd darknet/
!sed -i 's/OPENCV=0/OPENCV=1/' Makefile
!sed -i 's/GPU=0/GPU=1/' Makefile
!sed -i 's/CUDNN=0/CUDNN=1/' Makefile
!sed -i 's/CUDNN_HALF=0/CUDNN_HALF=1/' Makefile
!sed -i 's/LIBSO=0/LIBSO=1/' Makefile
Run make command to build darknet.
!make
Copy all the files from your folder to the darknet directory in colab VM.
%cd data/
!find -maxdepth 1 -type f -exec rm -rf {} \;
%cd ..
%rm -rf cfg/
%mkdir cfg
Copy your obj.zip file into the darknet directory and unzip it into the data folder.
!cp /mydrive/yolov4-tiny/obj.zip ../
!unzip ../obj.zip -d data/
Copy your yolov4-custom-tiny.cfg file into the darknet directory.
!cp/mydrive/yolov4-tiny/yolov4-tiny-custom.cfg ./cfg
Copy obj.names and obj.data into the darknet by running following command.
!cp /mydrive/yolov4-tiny/obj.names ./data
!cp /mydrive/yolov4-tiny/obj.data  ./data
Copy process.py file into current darknet directory.
!cp /mydrive/yolov4-tiny/process.py ./
Run process.py by the following command to create train.txt and test.txt file into the darknet directory.
!python process.py
Download the pre-trained yolov4-tiny weights from the official darknet repo.
!wget https://github.com/AlexeyAB/darknet/releases/download/darknet_yolo_v4_pre/yolov4-tiny.conv.29
Finally, start your training by running the following command.
!./darknet detector train data/obj.data cfg/yolov4-tiny-custom.cfg yolov4-tiny.conv.29 -dont_show -map
If you want to restart training then run the following command.
!./darknet detector train data/obj.data cfg/yolov4-tiny-custom.cfg /mydrive/yolov4-tiny/training/yolov4-tiny-custom_last.weights -dont_show -map
If you don’t know when to stop training your model you must follow the below link to get more information.
https://github.com/AlexeyAB/darknet/#user-content-when-should-i-stop-training
Check performance.
def imShow(path):
    import cv2
    import matplotlib.pyplot as plt
    %matplotlib inline
    image = cv2.imread(path)
    height, width = image.shape[:2]
    resized_image = cv2.resize(image,(3*width, 3*height),
                  interpolation = cv2.INTER_CUBIC)
    fig = plt.gcf()
    fig.set_size_inches(18, 10)
    plt.axis(“off”)
    plt.imshow(cv2.cvtColor(resized_image, cv2.COLOR_BGR2RGB))
    plt.show()
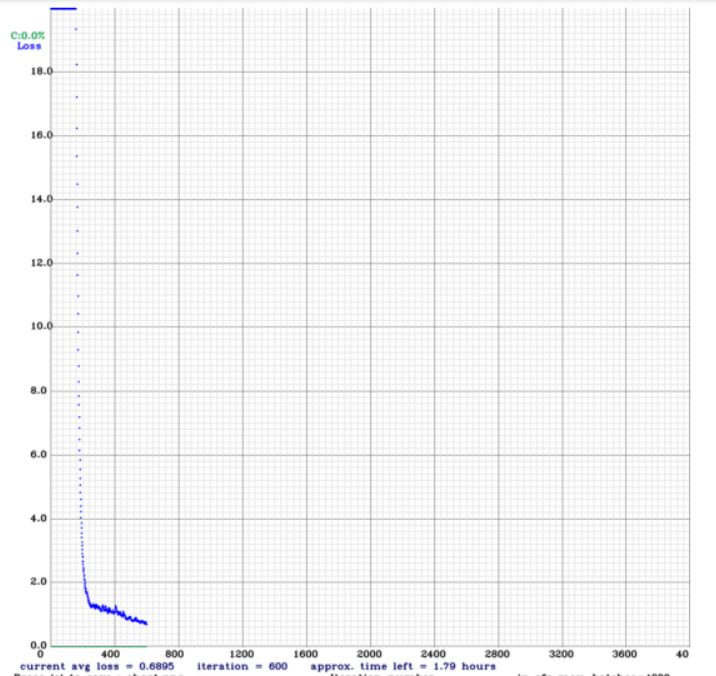
Check the training chart
imshow('chart.png')
Output:
Test your model’s accuracy and performance.
%cd cfg
!sed -i 's/batch=64/batch=1/' yolov4-tiny-custom.cfg
!sed -i 's/subdivisions=16/subdivisions=1/' yolov4-tiny-custom.cfg
%cd ..
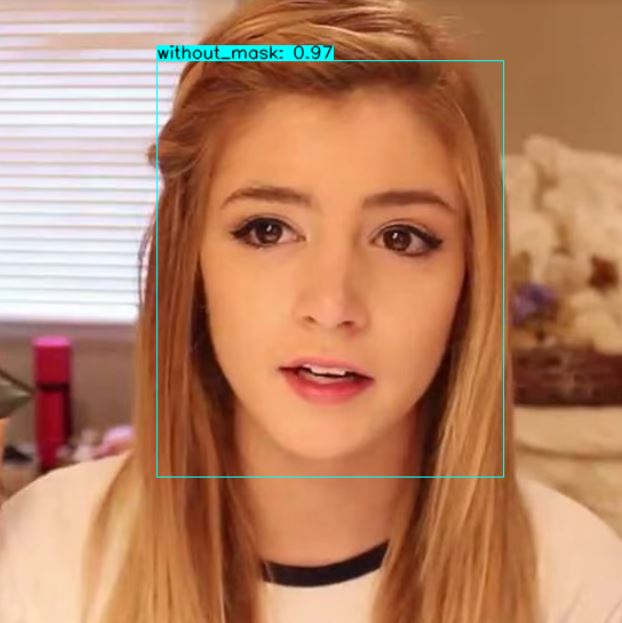
Finally, run mask detection model into an image.
!./darknet detector test data/obj.data cfg/yolov4-tiny-custom.cfg
/mydrive/yolov4-tiny/training/yolov4-tiny-custom_best.weights
/mydrive/mask_test_images/image1.jpg -thresh 0.3
Show this output of the image in colab VM.
imShow('predictions.jpg')
Finally, this model can successfully detect a person without a mask and with a mask with high accuracy.