In this tutorial, we are going to build, train and deploy the machine learning model using Amazon Sagemaker. Then prepare a Rest API call using API gateway which will request our input data to Lambda function. This lambda function will call our model and predict the output which will be responded to us via AWS API gateway.
Both services, AWS Sagemaker and AWS API will be linked using the Lambda function.
Let’s first dig into Amazon Sagemaker.
Amazon Sagemaker
Amazon Sagemaker is an AWS machine learning service that allows you to build, train and deploy models. This Amazon Sagemaker service provides an integrated Jupyter Notebook for access to our data resources for analysis and exploration. Sagemaker provides us with common machine learning algorithms. It allows us to deploy our machine learning model using AWS API Gateway which will be covered in this tutorial.
Let’s first start signing into our AWS console and search for Amazon Sagemaker. After that follow the below steps
Create New Sagemaker Notebook
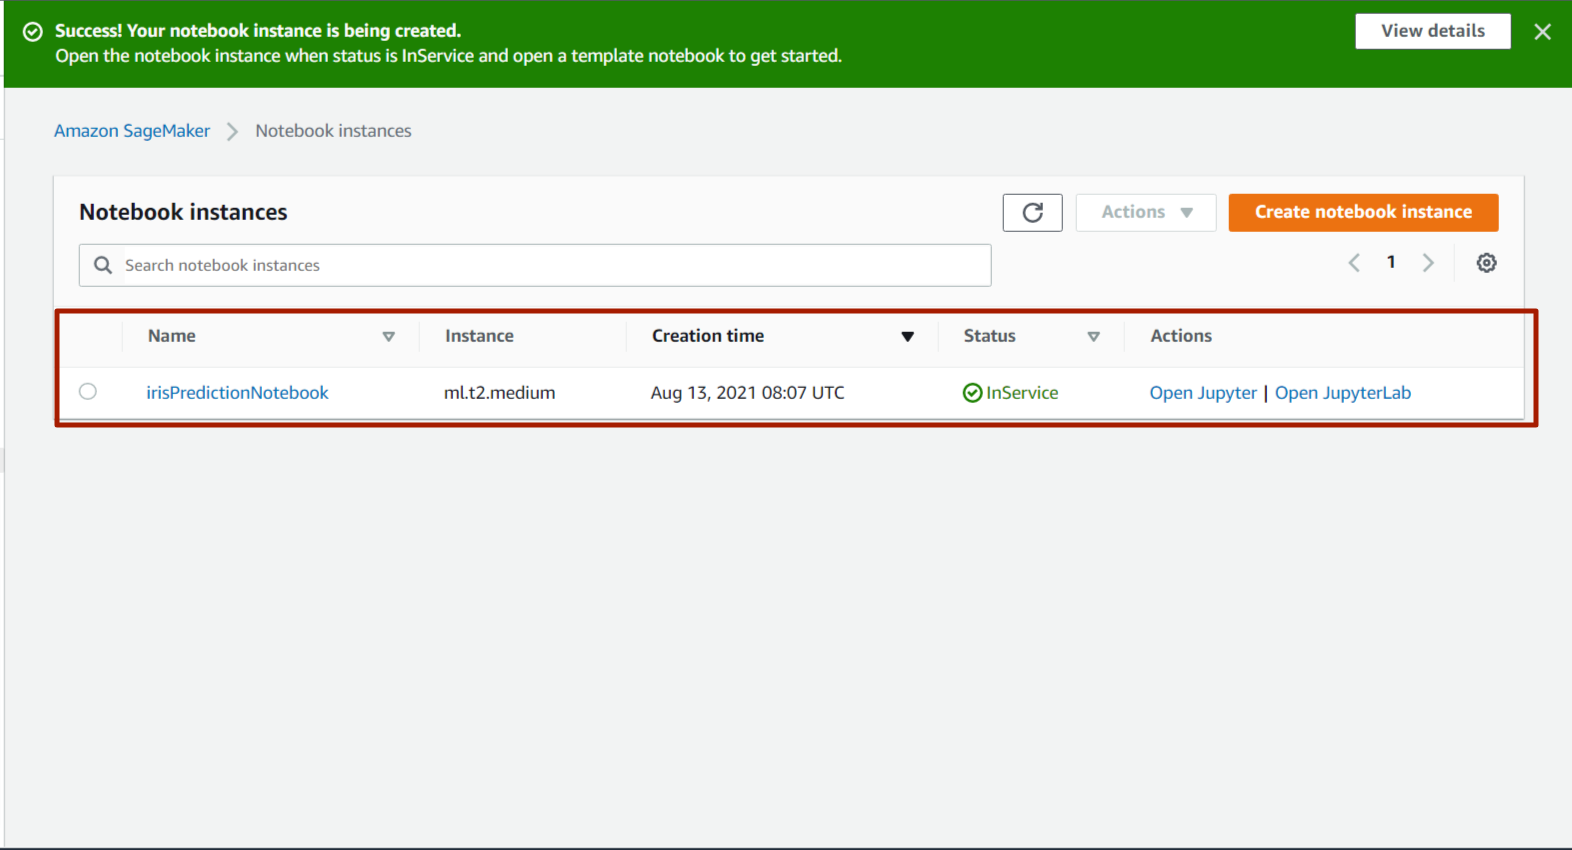
Create a new Sagemaker Notebook instance here I have named it as irisPredictionNotebook. In this AWS creates a new IAM Role for your execution.

After creating a notebook instance we will wait for the instance to change its status pending to inService. And open it in the jupyter notebook.
Now open the Jupyter and make a new jupyter notebook.
Prepare the Machine Learning Model
Here we are using a simple Iris dataset provided by `sklearn.dataset.iris`. We are going to train and test a split of this dataset.
Firstly we Initialize the necessary python packages.
import pandas as pd
import numpy as np

from sklearn import datasets
from sklearn.model_selection import train_test_split
Now we are going to load the iris dataset from the sklearn library.
# Load dataset
iris = datasets.load_iris()
And get target names(labels) and different features of the dataset.
# print the label species(setosa, versicolor,virginica)
print(iris.target_names)

# print the names of the four features
print(iris.feature_names)
['setosa' 'versicolor' 'virginica']
['sepal length (cm)', 'sepal width (cm)', 'petal length (cm)', 'petal width (cm)']
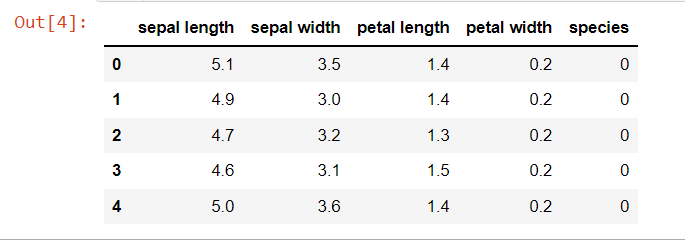
Now we are going to prepare the dataframe from this data.
data=pd.DataFrame({
    'sepal length':iris.data[:,0],
    'sepal width':iris.data[:,1],
    'petal length':iris.data[:,2],
    'petal width':iris.data[:,3],
    'species':iris.target
})
data.head()
# Features
X=data[['sepal length', 'sepal width', 'petal length', 'petal width']]

# Labels
y=data['species']
# Split dataset into training set and test set
X_train, X_test, y_train, y_test = train_test_split(X, y, test_size=0.3)
Generally, we put our dependent column at the end of the dataframe. But here we have to make sure the target column(output variable) is the first column of our dataframe
train = pd.concat([pd.Series(y_train, index= X_train.index, name='species', dtype='int'), X_train], axis=1)

test = pd.concat([pd.Series(y_test, index= X_test.index, name='species', dtype='int'), X_test], axis=1)
Now save the train dataset so we can upload it to the S3 bucket.
train.to_csv("train.csv",index=False, header=False)
Now we are going to upload this dataframe in the S3 bucket so in the later on training stage Sagemaker will take this CSV file from this S3 bucket.
Here we are using the default S3 bucket with a folder of `IrisDataSet`and upload our train.csv in the default bucket.
import sagemaker,boto3, os

bucket = sagemaker.Session().default_bucket()
prefix = 'IrisDataset'

boto3.Session().resource('s3').Bucket(bucket).Object(
    os.path.join(prefix, 'data/train.csv')).upload_file('train.csv')
Let’s check whether it successfully saved the bucket.
!aws s3 ls {bucket}/{prefix}/data --recursive
2021-08-13 05:16:09 1890 IrisDataset/data/train.csv
Train the model
Before we train the model, we require some information such as the region on which this Sagemaker instance is running and the execution role that was created during the creation of the ‘irisPredictionNotebook’ Sagemaker instance.

import sagemaker

region = sagemaker.Session().boto_region_name
print(f"Aws Region name : {region}")

role = sagemaker.get_execution_role()
print(f"Role ARN (AWS Resource Name) : {role}")
As I am working on us-east-1 and the execution role is the same as the IAM role created during the creation of ‘irisPredictionNotebook’.
from sagemaker.session import TrainingInput
s3_output_location = 's3://{}/{}/{}'.format(bucket, prefix, 'xgboostModel')
container = sagemaker.image_uris.retrieve("xgboost", region, "latest")
Model is built using sagemaker.estimator which has different parameter such as image_uri which we have defined above, here we have used instance_type which is ‘ml.m4.xlarge’ and instance_count=1 this all are properties of EC2 instance in which our model will be prepared and deployed.
xgboostModel = sagemaker.estimator.Estimator(
    image_uri=container,
    role = role,
    instance_count=1,
    instance_type='ml.m4.xlarge',
    output_path = s3_output_location,
    sagemaker_session= sagemaker.Session()
)
Now we set xgboost model hyperparameters such as number of rounds, number of classes and objectives. You can add more parameters according to your need.
xgboostModel.set_hyperparameters(
    objective="multi:softmax",num_class=3,
    num_round=100)
Here we have fit our iris train data to the xgboost model.
from sagemaker.session import TrainingInput

training_input = TrainingInput(
    "s3://{}/{}/{}".format(bucket, prefix, 'data/train.csv'), content_type='csv')
xgboostModel.fit({'train':training_input},wait=True)
It will start to train the model.
Deploy the model
Here Sagemaker deploys our model and gets the endpoint. This endpoint is used by the lambda function to predict user input data.
import sagemaker
from sagemaker.serializers import CSVSerializer

xgb_predictor = xgboostModel.deploy(initial_instance_count=1,instance_type='ml.t2.medium',serializer=CSVSerializer())
xgb_predictor.endpoint_name

It will successfully deploy our model and return the endpoint for this model. This model is saved in our default S3 bucket that we have mentioned above. And now we are ready to prepare our lambda function.
Before we move onto the lambda function first we predict our test dataset and find the accuracy for this model.
Predict Test Dataset
test_data_array = test.drop(['species'], axis=1).values
predictions = xgb_predictor.predict(test_data_array).decode('utf-8')
y_pred= np.fromstring(predictions[1:], sep=',')
from sklearn.metrics import accuracy_score
accuracy_score(y_true, y_pred)
0.91111
And here I have got 91% accuracy.
Now let’s move into the Lambda function.
Lambda Function
Lambda function is a serverless compute service that lets us run our code without managing the server. Lambda functions trigger from the code based on incoming user requests or events. Here we will use AWS API to trigger the lambda function.
Now let’s create lambda functions.
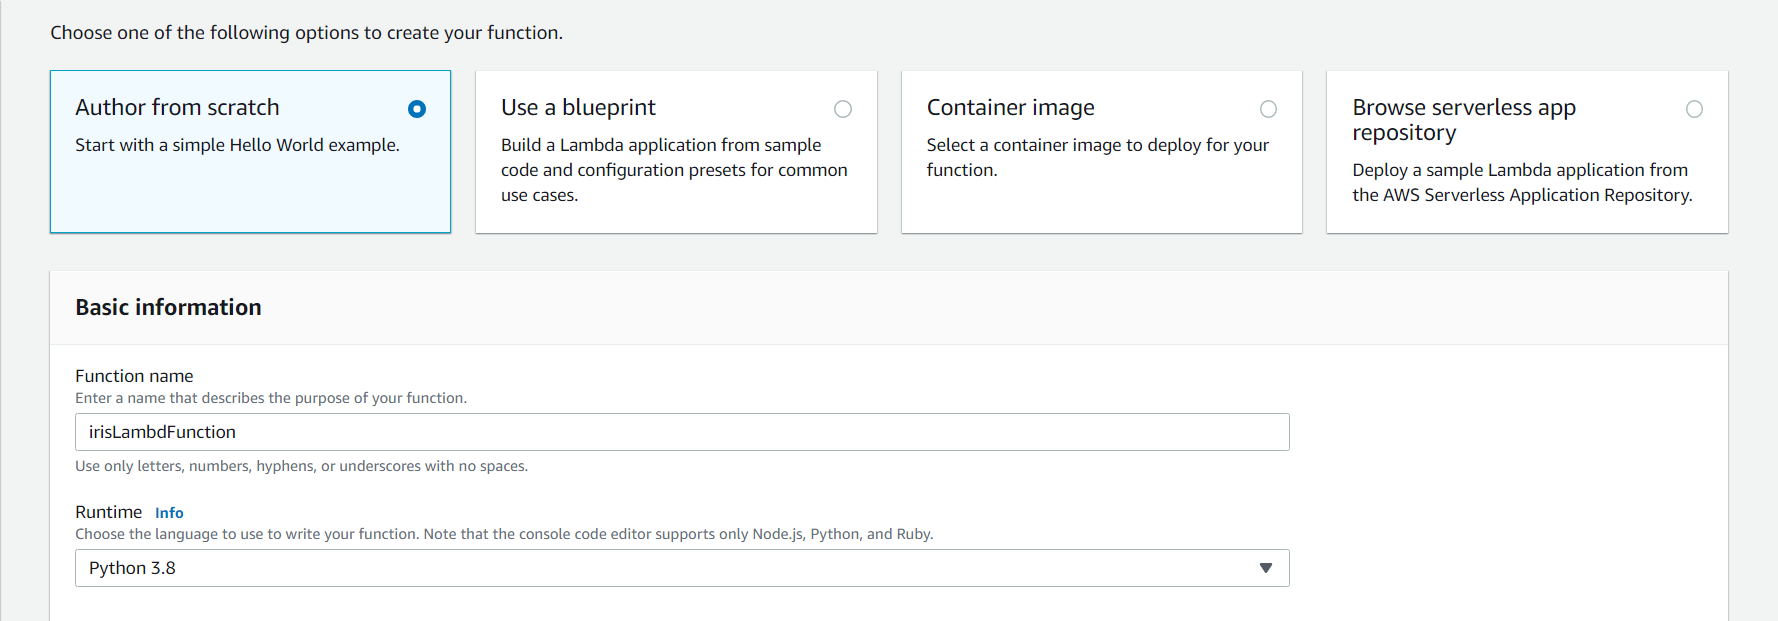
Here AWS will make one of the iam roles for our lambda function. Rather than creating an iam role for every service its best practice to create one iam role for our task.
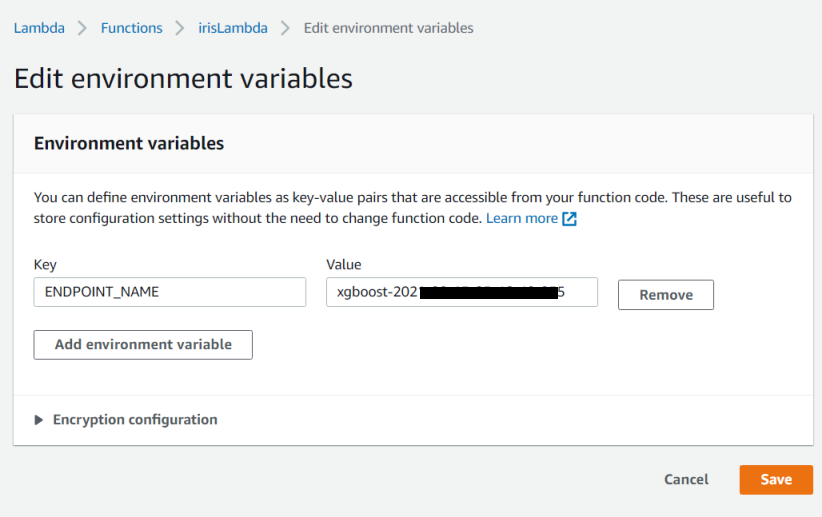
Before we start to code our lambda functions we need to save one environment variable namely ENDPOINT_NAME and the value will be our endpoint which we got from the Sagemaker.
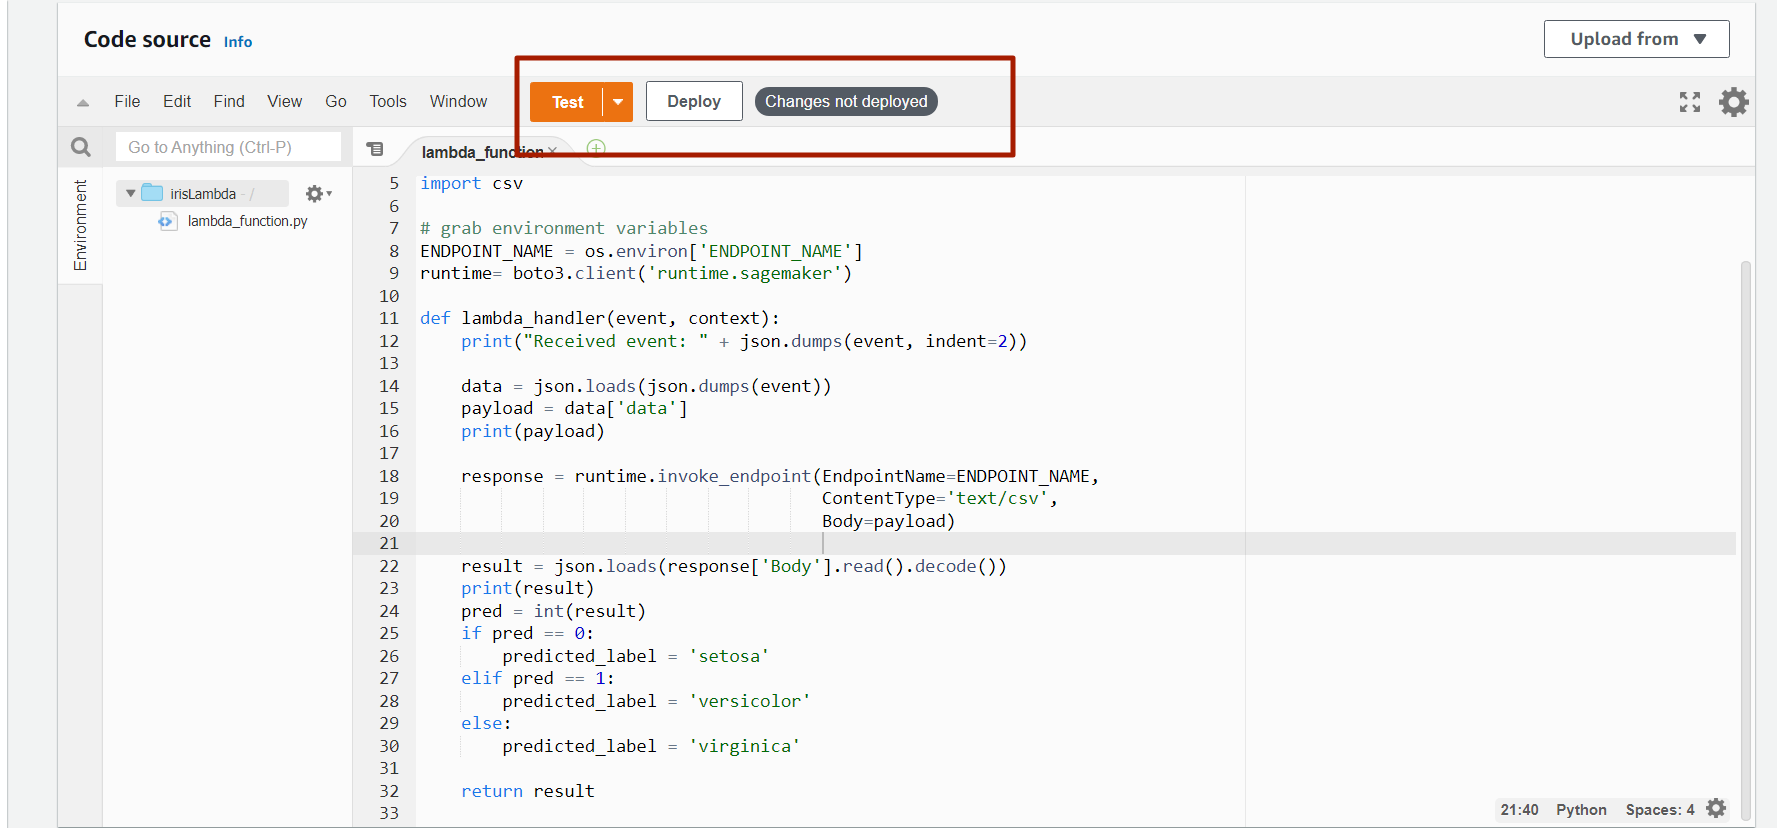
 irisLambdaFunction.py
Here we have got the endpoint and pass it to the sagemaker runtime and predict the result for input data.
import os
import io
import boto3
import json
import csv

# grab environment variables
ENDPOINT_NAME = os.environ['ENDPOINT_NAME']
runtime= boto3.client('runtime.sagemaker')

def lambda_handler(event, context):
    print("Received event: " + json.dumps(event, indent=2))

    data = json.loads(json.dumps(event))
    payload = data['data']

    response = runtime.invoke_endpoint(EndpointName=ENDPOINT_NAME,
                                       ContentType='text/csv',
                                       Body=payload)

    result = json.loads(response['Body'].read().decode())


    pred = float(result)
    predicted_label = f"Prediction of {data} is : "


    if pred == 0.0:
        predicted_label += 'setosa'
    elif pred == 1.0:
        predicted_label += 'versicolor'
    else:
        predicted_label += 'virginica'

    print("Predicted Label : ", predicted_label)

    return predicted_label
This function will return the predicted label. Now deploy the lambda function. The Deploy button will be found next to the test button. You can look at it in the below image.
Now, let’s move into the AWS API Gateway.
AWS API Gateway
AWS APIs will act as the front door to access our backed services. Using API Gateway we can create RESTful APIs to enable two way communication.
Now let’s build our REST API. That will fetch a user request and pass it to the Lambda function and the result of the Lambda function will be responded to the user.
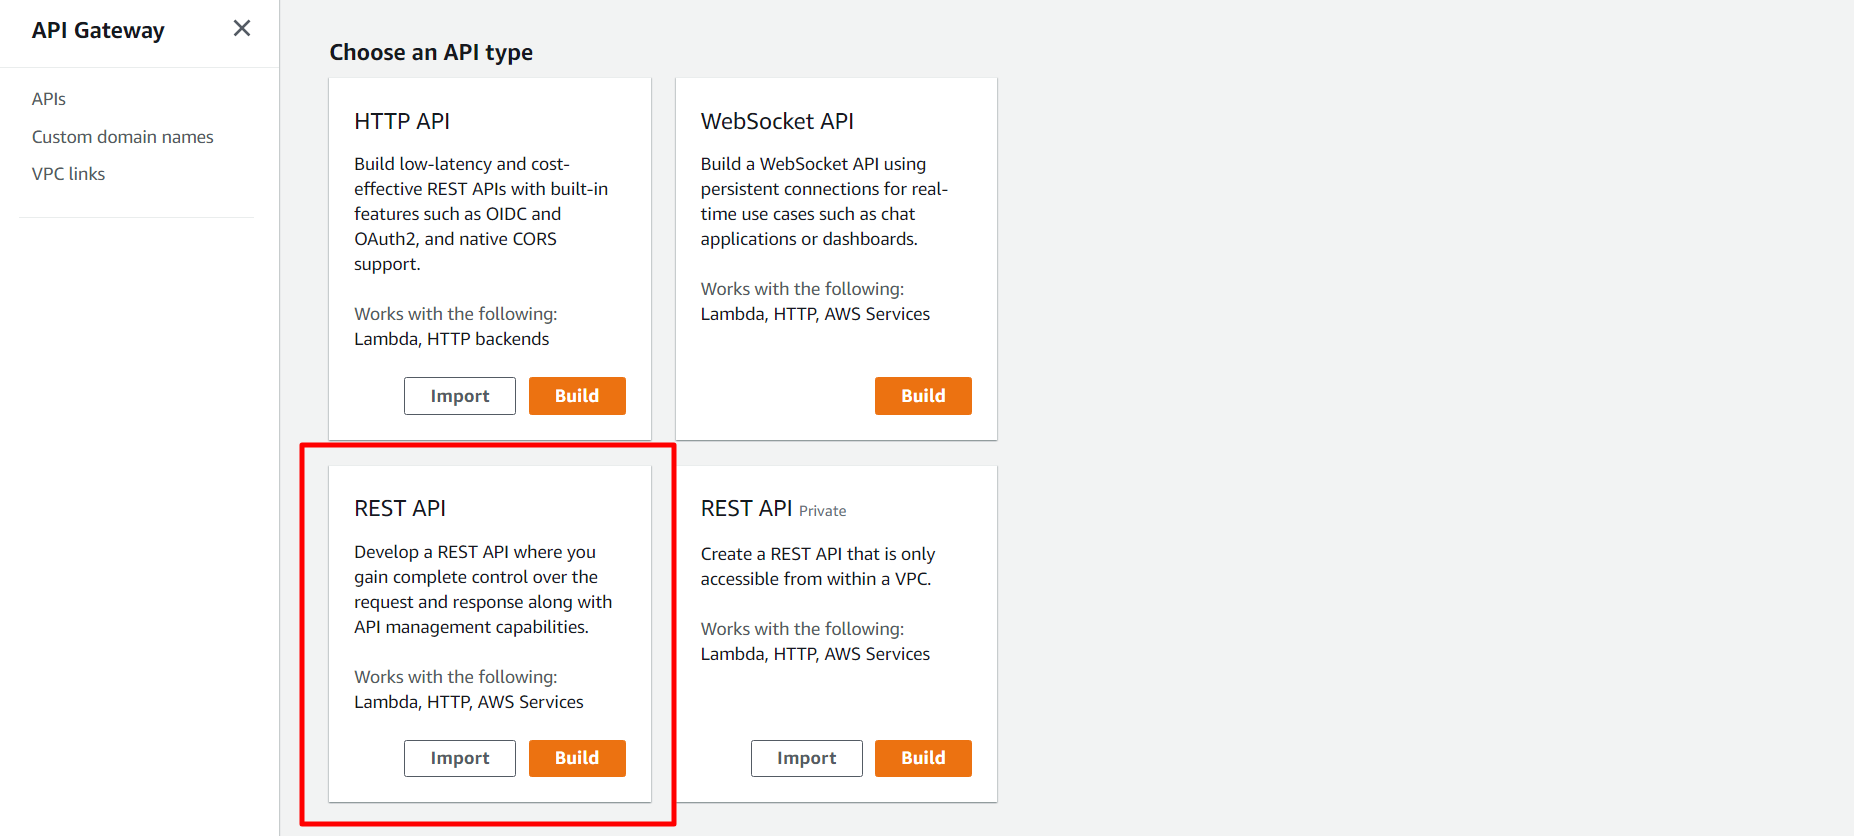
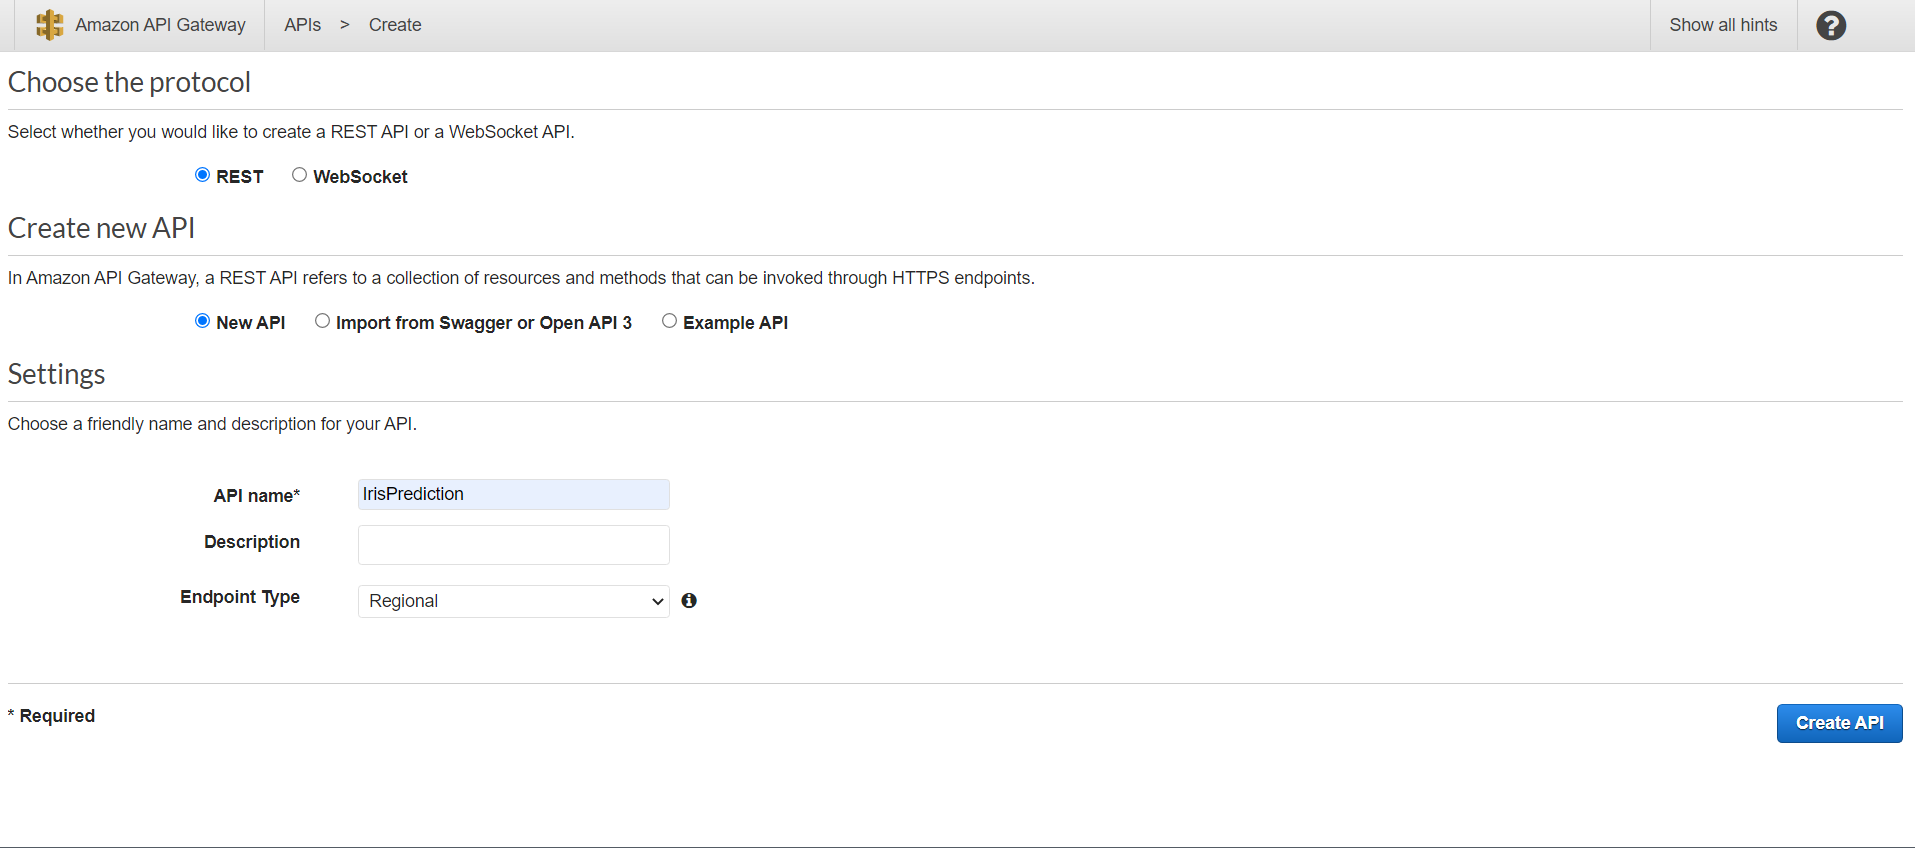
Now let’s build a Rest API Gateway.
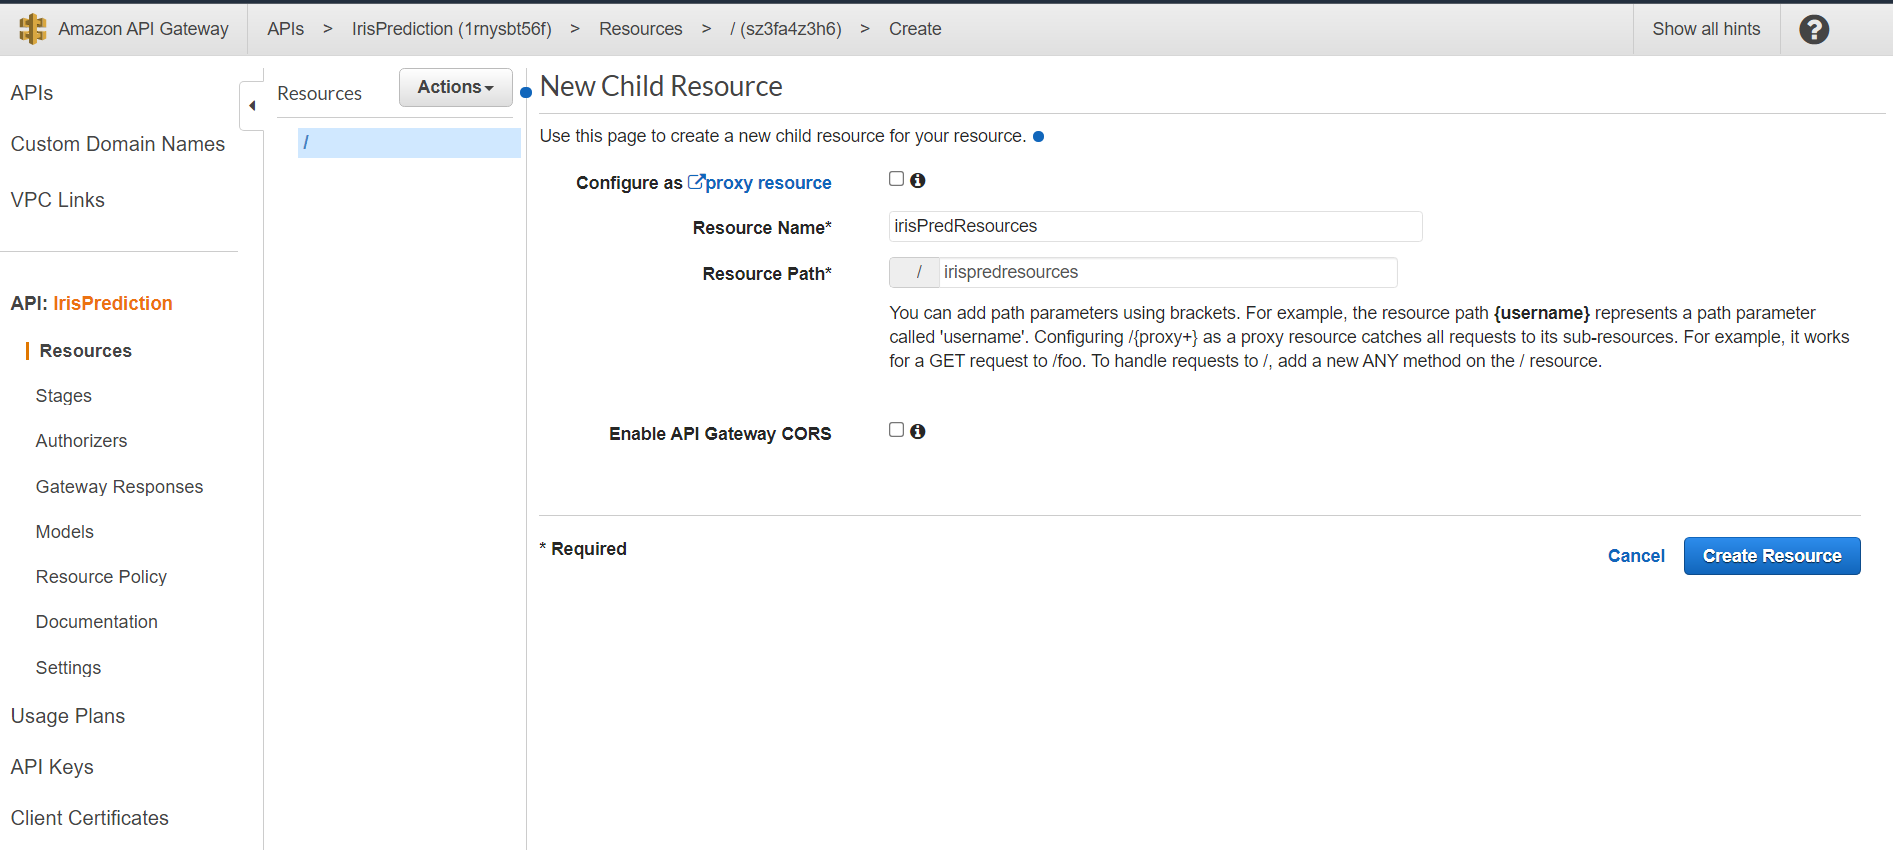
After that, we need to create resources. For that, we need to go Action and CreateResources.
Next, we will be creating a method that will be found in Action → CreateMethod. There are multiple types of methods for i.e POST, GET, PUT etc. We are going to choose the POST method.
As we are using the Lambda function we are going to choose the integration type Lambda Function.
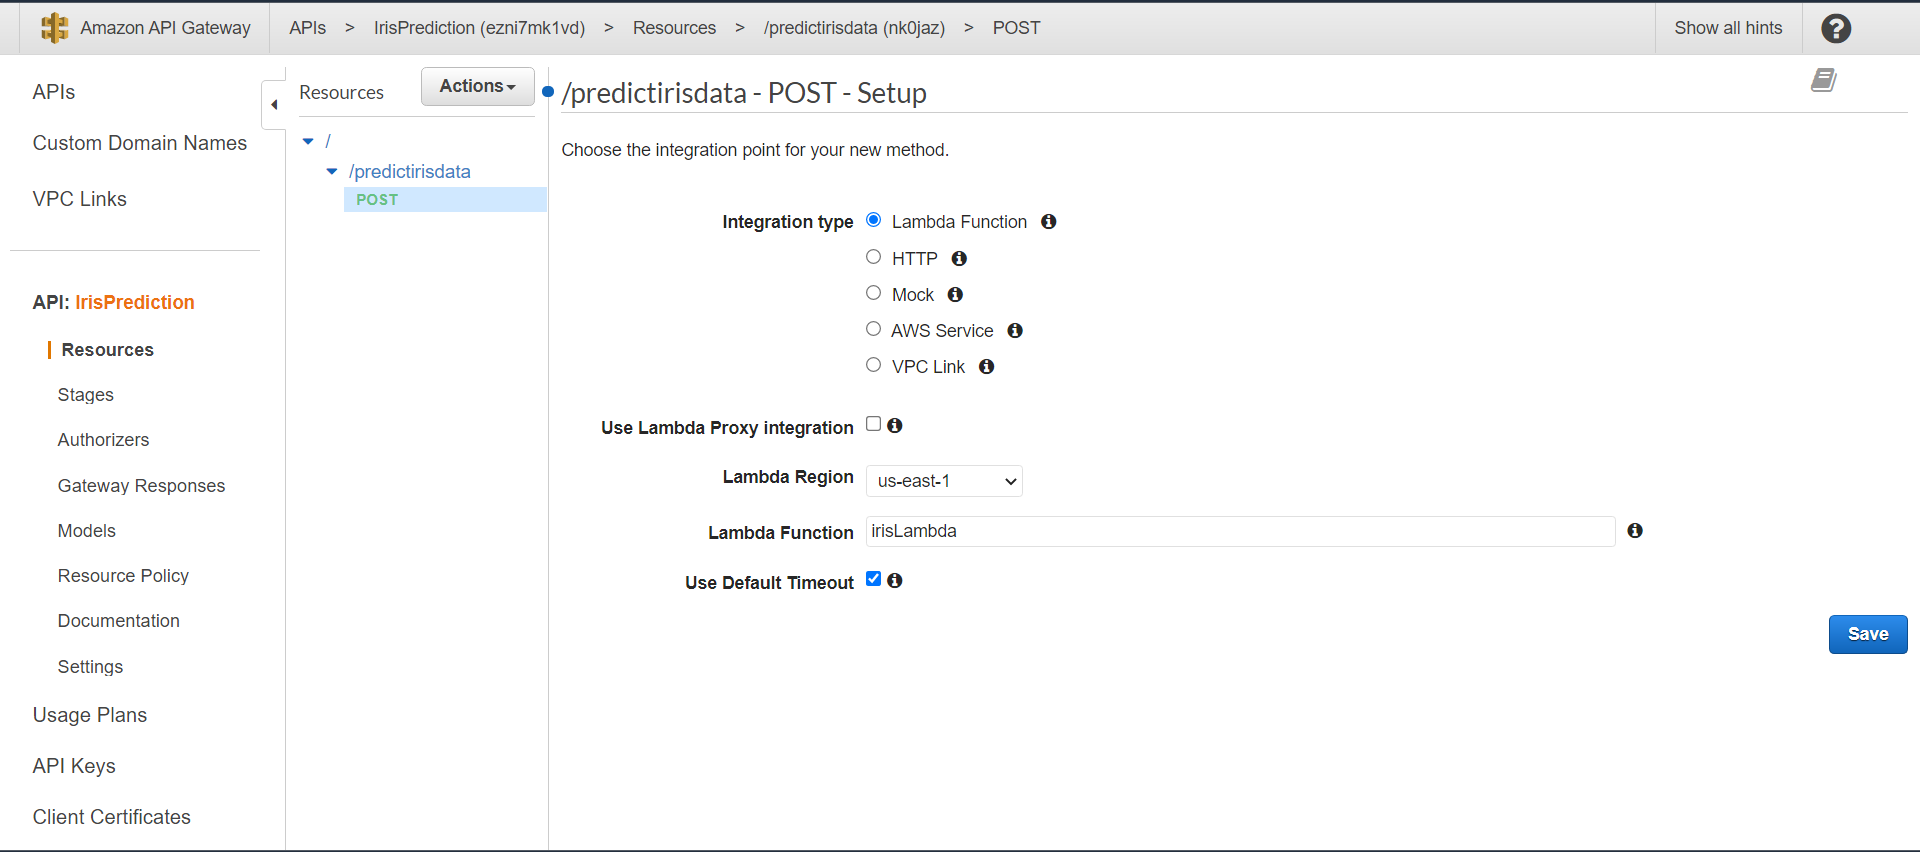
Click on the Save button and then deploy the API. For that on the Action menu choose Deploy API. Here we have to create a new stage called a test.
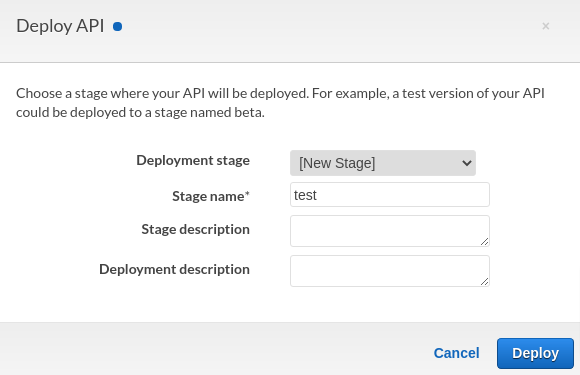
This step will provide us with invoke URL.
Now let’s test our URL using postman. Paste this URL. We need to pass our data in JSON as mentioned below.
